
 REVIEWS
How to Apply Patches: A UK Guide to Iron-On, Sew-On & Velcro Application
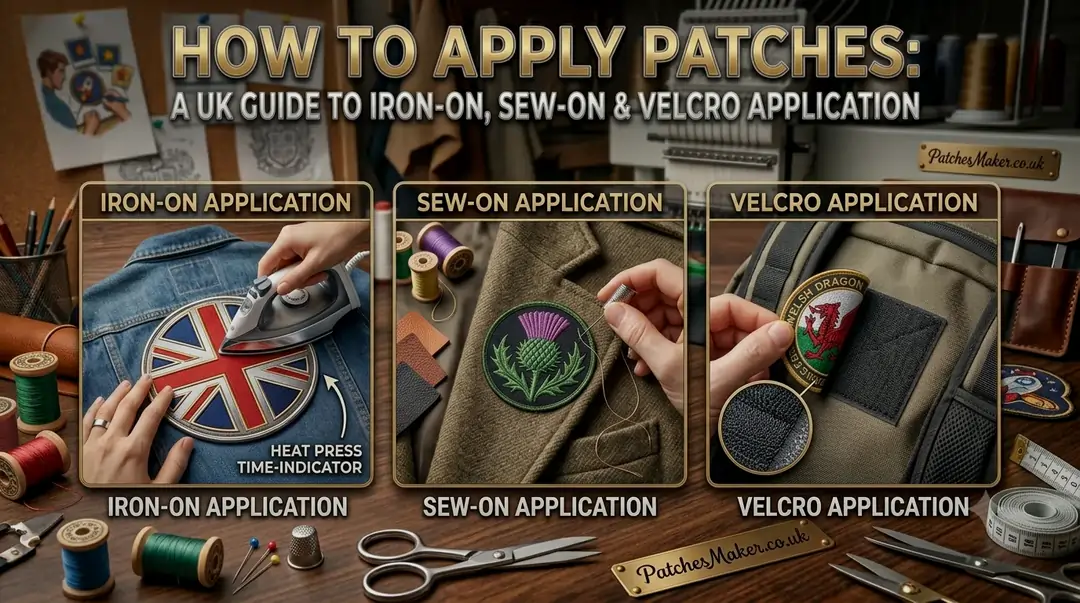
A patch can completely change the look of your favourite attire or accessory in a matter of minutes.
In many cases, a patch is more than decoration. It tells a story, marks an achievement, or helps create a sense of identity.
Yet despite their popularity, many people hesitate to apply.
- Should you iron it on?
- Would sewing be more secure?
- Is Velcro a better option if the patch needs to be changed regularly?
The answer depends on the patch itself, the fabric you’re attaching it to, and how the item will be used.
Keep reading to know everything about applying iron-on, sew-on, and Velcro patches correctly so you can achieve a clean, professional result that lasts.
What You Need To Know About Patches
Some people use patches to showcase their interests. Others use them to represent organisations, clubs, businesses, sports teams, or military groups.
So in this moment, if you are planning to place an order or have received one, we know the excitement you have right now.
Here is everything that you need to know about patch orders.
Understanding the Three Main Patch Types
People researching how to order patches with no minimum are often surprised by the variety of patch styles now available in small production runs.
It is helpful to understand the differences between the most common patch backings before reaching for an iron or needle.
- Iron-On Patches
Iron-on patches feature a heat-activated adhesive on the back.
When heat and pressure are applied, the adhesive melts and bonds with the fabric.
They are popular because:
- Application is quick
- No sewing experience is required
- They create a neat appearance
- They’re suitable for many everyday garments
Iron-on patches are particularly common on denim jackets, backpacks, hoodies, and casual clothing.
- Sew-On Patches
Sew-on patches rely entirely on stitching for attachment.
They do not contain heat-activated glue and are secured using thread around the border of the patch.
Many people prefer sew-on patches because they:
- Offer excellent durability
- Work on a wider range of fabrics
- Handle frequent washing well
- Remain secure under demanding conditions
They’re often used for uniforms, workwear, sports apparel, and outdoor clothing.
- Velcro Patches
Velcro patches consist of two components.
One side is attached to the garment, while the other is attached to the patch itself.
This allows patches to be removed and replaced whenever needed.
Velcro-backed patches are commonly used for:
- Tactical gear
- Security uniforms
- Airsoft equipment
- Military clothing
- Event identification
They offer flexibility that permanent attachment methods cannot.
How To Choose the Right Application Method
A common mistake is assuming every patch can be applied the same way.
In reality, the best method depends on how the item will be used.
Consider these questions:
- Will the garment be washed frequently?
- Does the patch need to be removable?
- Is the fabric heat-resistant?
- Will the item experience heavy wear?
For example, a decorative patch on a denim jacket may work perfectly with an iron-on backing.
A patch attached to a work uniform that gets washed every week may benefit from sewing.
A tactical vest that requires changing identification patches will likely require Velcro.
Choosing the correct application method from the beginning often prevents problems later.
How to Apply Iron-On Patches Correctly
Iron on patches remain one of the most popular options because they’re quick and accessible.
However, many application failures happen because people rush the process.
Step 1 – Check the Fabric
Not every fabric can safely handle high heat.
Iron-on patches generally work well with:
- Cotton
- Denim
- Polyester-cotton blends
- Canvas
Use caution with:
- Nylon
- Silk
- Leather
- Waterproof fabrics
- Heat-sensitive materials
If you’re unsure, test the garment’s heat tolerance first.
Step 2 – Prepare the Surface
Lay the garment on a flat, heat-resistant surface.
Remove wrinkles by lightly ironing the area where the patch will be placed.
A smooth surface often helps create better adhesive contact.
Step 3 – Position the Patch
Once heat is applied, repositioning becomes difficult. So carefully place the patch exactly where you want it.
Take a moment to check alignment before continuing.
Step 4 – Apply Heat and Pressure
Place a thin cloth or pressing sheet over the patch. Using a hot iron without steam, press firmly for approximately 20 to 30 seconds.
Avoid moving the iron around as if you’re ironing clothes. Instead, apply steady pressure directly over the patch.
Step 5 – Allow It to Cool
Resist the temptation to test the edges immediately. Let the patch cool fully before checking the bond.
This gives the adhesive time to set properly.
Common Iron-On Mistakes
Many peeling problems can be traced back to simple application errors.
Some of the most common include:
- Using insufficient heat
- Applying pressure for too little time
- Using steam during application
- Ironing onto unsuitable fabrics
- Skipping surface preparation
A successful application depends on heat, pressure, and patience working together.
When Sewing Is the Better Choice
Iron-on patches are convenient, but sewing often provides greater long-term durability.
Stitching may be the safer option if a patch is expected to experience heavy use.
Many organisations choose sew-on patches because they remain secure even after repeated washing and daily wear.
In fact, some patch owners combine both methods.
They iron the patch into position first and then reinforce the edges with stitching.
This approach offers the convenience of adhesive placement with the durability of sewing.
How to Sew On a Patch
The process is straightforward, even for beginners.
Gather Your Materials
You’ll need:
- Needle
- Matching thread
- Scissors
- Pins or fabric clips
Secure the Patch
Position the custom sew on patches where desired, then use pins or clips to hold them in place while sewing.
Stitch Around the Border
Using small, even stitches, work your way around the edge of the patch. Your goal should be consistency rather than speed.
Take your time and keep the stitching close to the border.
Finish Securely
Tie off the thread securely on the inside of the garment. Trim any excess thread for a clean appearance.
Keep in mind that a carefully sewn patch can remain attached for years!
How to Apply Velcro Patches
Velcro patches offer a completely different advantage: flexibility.
Instead of committing to a permanent design, users can swap patches whenever needed.
Step 1- Attach the Base Layer
The loop side of the Velcro is usually sewn or bonded to the garment.
Many tactical and work garments already include Velcro panels.
Step 2- Align the Patch
Position the hook-backed patch over the panel and take a moment to ensure proper alignment.
Step 3- Press Firmly
Apply even pressure across the patch to ensure full contact. A properly attached Velcro patch should sit flat without lifting at the corners.
The process takes seconds, which makes it ideal for situations where patches need frequent changes.
Best Fabrics for Patches
Fabric selection often goes hand in hand with understanding how to choose between embroidered, woven, and PVC patches, as some patch materials perform better on certain fabrics than others.
Some materials naturally support patches better than others.
Strong patch-friendly fabrics include:
- Denim
- Canvas
- Cotton
- Twill
- Heavy workwear fabrics
These materials provide stable surfaces that help patches remain secure.
Lightweight or delicate fabrics may require additional care and often benefit from sewing rather than adhesive-only attachment.
How to Remove a Patch Safely
Eventually, you may want to replace or reposition a patch.
Removal methods vary depending on the backing.
Removing Iron-On Patches
You can use heat to soften the adhesive, so carefully warming the patch with an iron may help loosen the bond.
Once softened, the patch can often be lifted gradually.
Don’t forget to avoid pulling aggressively, as this can damage the fabric.
Removing Sew-On Patches
Carefully use small scissors to cut the stitches.
Work slowly to avoid damaging the garment underneath.
Removing Velcro Patches
Velcro removal is the simplest option. Simply peel the patch away from the backing panel.
No tools are required.
Washing and Care Tips
According to a professional bespoke patch maker, proper care significantly extends patch lifespan.
For Iron-On Patches
- Wait at least 24 hours before washing
- Wash garments inside out
- Use moderate temperatures
- Avoid excessive tumble drying
For Sew-On Patches
- Follow the garment’s normal washing instructions
- Inspect stitching occasionally
- Repair loose threads promptly
For Velcro Patches
- Remove detachable patches before washing, when possible
- Clean Velcro surfaces regularly
- Remove lint and debris from hook-and-loop sections
Small maintenance habits can prevent premature wear.
FAQs
Can iron-on patches be applied to backpacks?
Yes, but only if the material can tolerate heat. Canvas and cotton backpacks are generally suitable, while synthetic materials may require additional care or sewing.
Are sew-on patches stronger than iron-on patches?
In most cases, yes. Properly sewn patches usually offer greater durability and perform better under frequent washing and heavy use.
Can I wash clothes with iron-on patches?
Why not? But you need to wait 24 hours after application and follow proper washing instructions to maintain the bond of your patch.
Why is my iron-on patch peeling?
Common causes for patch peeling include insufficient heat, inadequate pressure, unsuitable fabric, or repeated exposure to high washing temperatures.
Are Velcro patches suitable for everyday clothing?
They can be, but they’re most commonly used on uniforms, tactical gear, and garments where patches need to be removed or replaced regularly.
Key Takeaways
Applying a patch successfully isn’t complicated, but the right method makes all the difference. Iron-on patches offer speed and convenience, sew-on patches deliver long-term durability, and Velcro patches provide unmatched flexibility.
Understanding the strengths of each option allows you to choose the best approach for your garment and intended use. All it takes is proper application and care for a quality patch to remain secure and attractive for years to come.

As the content specialist for PatchesMaker.co.uk, I focus on delivering practical insights into the world of custom patch manufacturing across the UK. My blogs cover everything from military and morale patches to promotional and corporate branding solutions. I break down production processes, quality standards, backing options, and design considerations in a clear and professional manner. Through informative and research-driven content, I aim to help businesses, sports teams, and institutions make confident decisions when investing in custom patches that reflect their brand values.